There’s a chapter in the novel, Outbound Train, where Granny Pearlene uses cakes as currency. I grew up with this type of bartering system which is why I incorporated it into my novel. The women in my family were known for their ability to cook bountiful meals which always included a made-from-scratch cake for dessert. It was common to find Appalachian women in the kitchen on Saturday night, making a pound cake, which typically included a pound of butter, flour, sugar, eggs.
Cakes were made on Saturday because the most delicious pound cake is one that sets overnight beneath glass cake pan. This allows the cake to re-absorb any moisture that would evaporate while the cake cools. I suppose women tired of plain pound cake, because in typical Appalachian fashion, the women in my family collected black walnuts (folk call it “wild-harvested” or “foraged”) and relished in adding them to cakes They also made a delicious black walnut ice cream, which we served on plain pound cakes, but I digress.
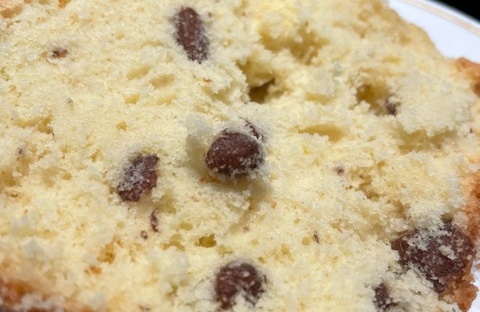
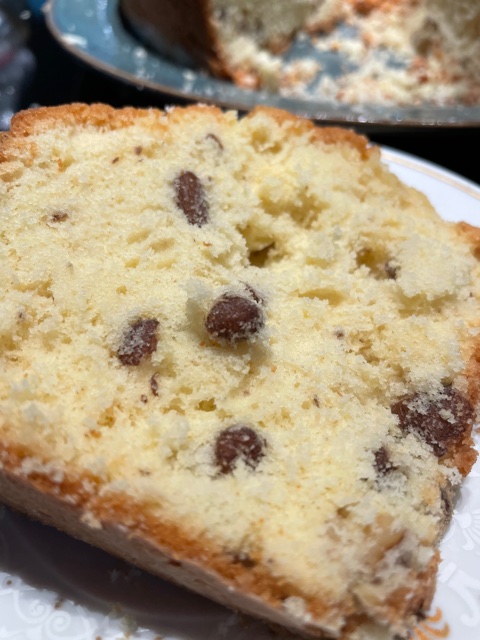
I grew up with two types of black walnut cakes: the “pound cake” variety, baked in a Bundt pan, and the “layered cake” with cream cheese frosting.
We used black walnuts because that is the only nut-tree common in our mountains. We couldn’t afford pecans, which grow abundantly in the Southern most part of the US. Black walnuts shouldn’t be confused with what we call “English walnuts.” Ours are tangy and strong due in part to an abundance of oil in the meat of the nut. While English walnuts can be used in this recipe, the strength of the black walnut can’t be duplicated.
As a child, my brother and I would wait at the bus stop beneath two gigantic black walnut trees at the edge of the road. We had a job while waiting, rolling the green-husked walnuts into the tire path with our feet so Poppa would drive over them each evening at precisely 4:40 pm when he returned from work. We knew better than to position the walnuts with our fingertips. Black walnut husks have been used for decades as ink and dye. No one has ever mastered the art of collecting black walnuts without wearing stained fingertips for weeks after.
W. Cloer B.C. N.C.
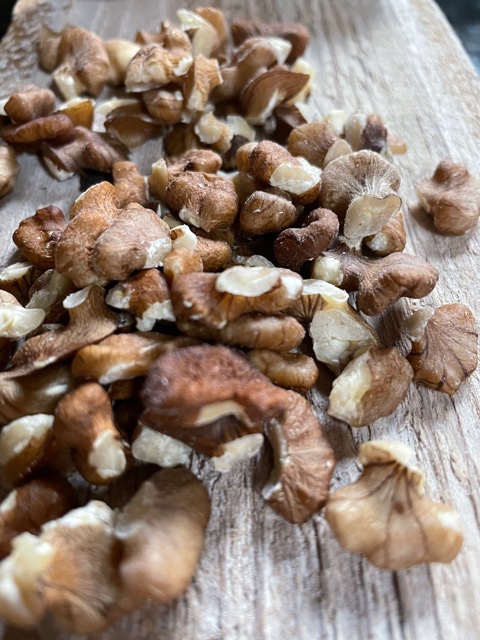
After Poppa’s truck rattled across the walnuts, mother steered a wheelbarrow to the end of the driveway and donned bright pink Palmolive dishwashing gloves. She tossed the green husks aside and collected the nuts. That was phase one of the harvesting process. From there, she positioned the nuts on a piece of tin and let them dry in the sun. Once dry, a much longer phase two began: each night she and Poppa would sit in the floor; they each had a rock, or sometimes a brick, and a hammer. There’s a certain way one holds a walnut to crack it, and before you go buying a “nutcracker,” no human has ever created one tough enough to crack an Appalachian walnut. You need a hammer, a rock, patience, and perhaps a Magnavox television playing the nightly news with Walter Chronkite.
That’s how it was done when I was a kid. After doing the “hard part,” of cracking the exterior shell, my parents passed the broken nuts to me or my brother. We used a tiny hook to remove any pieces of the nut-meat that remained. We did this as a family and it was an honorable thing to do. As kids we didn’t complain when our parents asked us to do something; we had pride that they trusted we were capable.
Back to Saturday in the kitchen:
My mother didn’t exactly write out all her recipes so I was delighted to discover one in her recipe book. You see, the publisher in France wanted to know if the cakes in Outbound Train were real. If so, was I willing to share with her readers?
Y’all ! French chefs are considered the best in the world and she asked me to share our simple walnut cake used with nuts we pick up at the end of the road. Note: The FRENCH Translation of this blog post appears at the end of this post.
The recipe:
3 cups flour
2 cups sugar ( I use a mixture of white cane sugar, and light turbinado sugar). You can not use dark brown sugar in this recipe
1 cup butter, softened
2 teaspoons baking powder
1 cup black walnuts
3 eggs
1 cup milk: Mother would use whole milk. Not cream, and never 2%
Eggs were always kept at room temperature at my house. This is a tradition I continue, because I am fortunate enough to have a small flock of hens.
The process: Preheat oven to 325 degrees
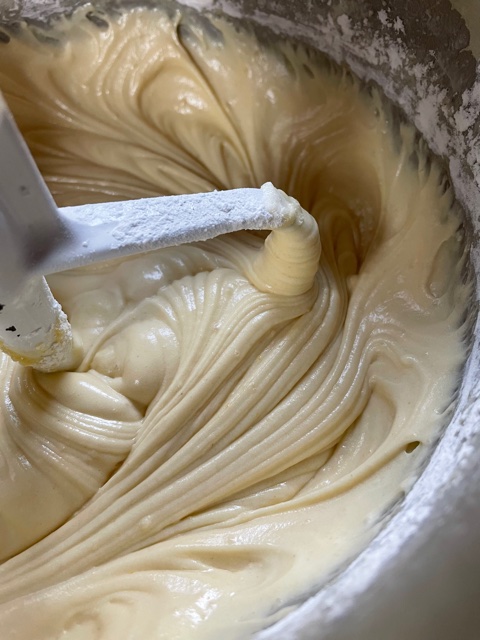
Cream butter and sugar together
Add eggs and mix slowly
Add 1 cup flour and the baking powder
Mix
Add another cup of flour
And then the milk
Mix
Add the final cup of flour
And the vanilla
Add the walnuts
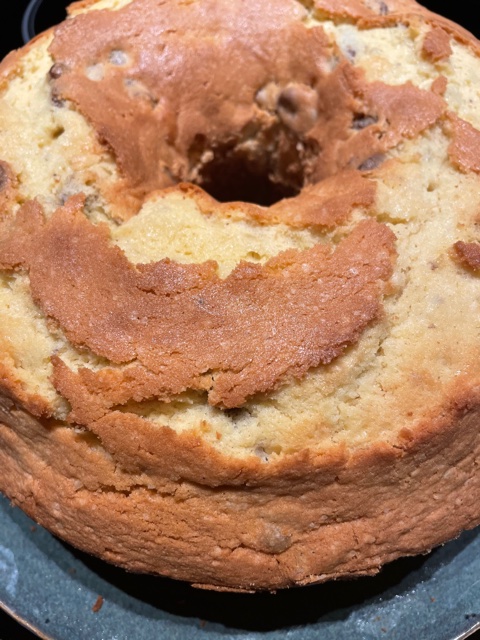
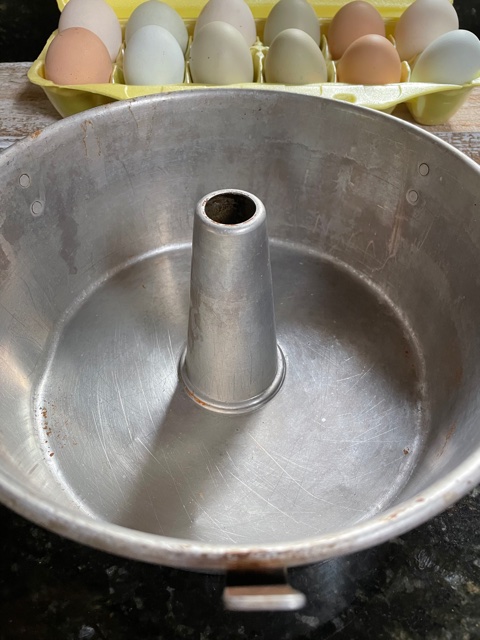
The pan: A Bundt pan is absolutely imperative in the success of this cake. I use my mother’s plain cake pan. She had “fancy” pans, with scalloped ridges, and designs. However, I grew up with simple cakes and I like to honor that memory. Granny Pearlene most certainly did not own a fancy pan.
My job as a child was to spread Crisco (or butter) on the bottom of the pan and then sprinkle a tablespoon of flour on the bottom, tapping the pan until flour covered the surface. Mother wanted to make sure the cake wouldn’t stick. Hers rarely did. Mine rarely come out intact.

Using a Bundt pan means bakers run the risk of having a lovely brown top and an unbaked center. Sometimes you may need to cover the top of the cake with aluminum foil and then use the “toothpick test.” (It used to be a broom straw test when I was growing up. We didn’t have toothpicks). What this means is you stick a toothpick into the center of the cake and remove it. If the toothpick has batter on it, then it isn’t finished. If it comes out clean, the cake is done.
My “Granny Winchester’s” Sunday table featured a pound cake every single Sunday until she stopped baking. Her favorite was a caramel apple cake. She also adored a pineapple pound cake. Just typing this makes me want to bake a caramel apple.
Don’t you miss the days of Sunday pound cakes. Tell me, what was your favorite?
Regardless of what Appalachian women added to the simple pound cake, we always had the pleasure of enjoying it with those we love.
Renea Winchester is the of Outbound Train, which released in April 2021 in France titled On the Other Side of the Tracks.
La pâtisserie comme monnaie d’échange : le gâteau aux noix de Mamie Pearlene
Dans le roman De l’autre côté des rails, Mamie Pearlene utilise ses gâteaux comme monnaie d’échange.
Petite, j’ai connu ce système de troc, et je l’ai incorporé à mon roman. Les femmes de ma famille étaient connues pour leurs merveilleux repas. Ils comprenaient toujours un gâteau fait-maison pour le dessert. Les femmes des Appalaches passaient souvent leur samedi soir en cuisine pour préparer le pound cake, préparé avec une livre (pound) de beurre, 1 livre de farine, une livre de sucre, des œufs. Les gâteaux étaient préparés le samedi car les meilleurs pound cakes sont ceux qui ont reposé toute la nuit sous une cloche en verre. Cela permet au gâteau de réabsorber l’humidité qui se serait sinon évaporée pendant la phase de refroidissement.
Je suppose que les femmes se sont lassées de la recette de base du pound cake. Comme cela se pratiquait couramment dans les Appalaches, les femmes de ma famille ramassaient les noix noires (les gens d’ici parlent de « récoltes sauvages » ou bien de « cueillettes ») et elles les ont délicieusement ajouté à leurs gâteaux. Elles préparaient également une succulente crème glacée aux noix noires, que l’on servait avec les pound cakes, mais je m’éloigne du sujet. Quand j’étais petite, il y avait deux sortes de gâteaux aux noix : le « pound cake » aux noix, cuit dans un moule à kouglof, et le « gâteau multicouche » et son glaçage au cream cheesse.
Miam.
Les femmes des Appalaches utilisaient des noix noires car c’est le seul arbre à noix qui soit courant dans nos montagnes. Nous ne pouvions pas nous permettre d’acheter des noix de pécan, qui poussent en abondance dans la plupart des États du sud. Les noix noires ne doivent pas être confondues avec ce que nous appelons les noix anglaises. Les nôtres ont un goût acidulé et prononcé, en partie dû à la forte concentration en huile au cœur de la noix.
Quand nous étions enfants, mon frère et moi attendions le bus sous deux énormes noyers qui poussaient au bord de la route. Tout en attendant le bus, nous avions pour mission de faire rouler l’enveloppe verte des noix sur les traces de roues pour que Papa roule dessus à 4h40 précises, tous les soirs, en revenant du travail. On savait bien qu’il ne fallait pas le faire avec les doigts. L’écorce de noix noire est utilisée depuis des décennies pour faire de l’encre et de la teinture. Personne n’a jamais réussi à ramasser ces noix sans garder les doigts tâchés pendant des semaines.
Une fois que la camionnette de Papa était passée sur les noix, ma mère poussait sa brouette jusqu’au bout de l’allée puis enfilait ses gants de vaisselle Palmolive rose. Elle jetait les enveloppes vertes sur le côté et ramassait les noix. C’était la phase une de la récolte. Elle plaçait ensuite les noix sur une plaque métallique et les laissait sécher au soleil. Après le séchage démarrait la phase deux, beaucoup plus longue : tous les soirs, Maman et Papa s’asseyaient par terre. Ils prenaient un caillou, parfois une brique, ainsi qu’un marteau.
Avant d’envisager l’achat d’un “casse-noix”, il faut savoir qu’il y a une façon de tenir la noix pour la casser. Ne perdez pas votre temps à chercher un outil du commerce pour vous faciliter la tâche. Aucun humain n’en a créé un qui soit assez solide pour casser une noix des Appalaches. Il vous faut un marteau, un gros caillou, de la patience, et peut-être une télévision Magnavox et les nouvelles du soirs par Walter Cronkite.
C’est comme ça qu’on faisait quand j’étais petite. Nous cassions les noix en regardant la télévision. Après avoir fait « le plus difficile », craquer la coquille, mes parents nous donnaient les noix, à moi et à mon frère. Nous utilisions un crochet minuscule pour retirer les derniers petits morceaux de cerneaux. Nous faisions cela en famille et c’était une chose honorable. Enfants, nous ne nous plaignions pas quand nos parents nous demandaient de faire quelque chose ; nous étions fiers d’être dignes de leur confiance.
Mais retournons maintenant dans la cuisine, les samedis soirs :
Ma mère n’écrivait pas vraiment toutes ses recettes et j’ai été ravie d’en découvrir une dans son carnet de recettes. L’éditrice française voulait savoir si les gâteaux du roman existaient. Et si j’étais d’accord pour les partager avec les lecteurs.
Les chefs français sont considérés comme les meilleurs du monde et elle m’a demandé de partager notre petit gâteau, confectionné avec les noix que nous ramassions au bout de la route.
Voici la recette :
- 3 mesures de farine
- 2 mesures de sucre (j’utilise un mélange de sucre de canne blanc et de sucre turbiné). On peut aussi utiliser du sucre brun
- 1 mesure de beurre ramolli
- 2 cuillérées à café de levure
- 1 mesure de noix
- 3 œufs
- 1 mesure de lait : ma mère utilisait du lait entier. Pas de crème et jamais de lait écrémé.
- 1 cuillérée à café de vanille liquide
Notes :
Les oeufs étaient toujours conservés à température ambiante. C’est une tradition que je perpétue, car j’ai la chance d’avoir quelques poules. Et nous avons plutôt la main lourde sur la vanille.
Marche à suivre :
- Préchauffer le four à 180°C
- Mélanger le beurre et le sucre
- Ajouter les œufs et mélanger doucement
- Ajouter une mesure de farine et la levure
- Mélanger
- Ajouter une autre mesure de farine puis le lait
- Mélanger
- Ajouter la dernière mesure de farine
- La vanille
- Les noix
- Verser dans le moule et cuire à 180 °C pendant 45 min à 1h. Jusqu’à ce que le cure-dent ressorte propre.
Le moule :
il est impératif de disposer d’un moule à kouglof pour réussir ce gâteau. J’ai utilisé le moule à pound cake tout simple de ma mère. Elle possédait aussi des moules «fantaisie », ornés et festonnés. Mais j’ai toujours connu des gâteaux simples et je voulais faire honneur à ce souvenir.
Enfant, ma tâche était d’étaler la margarine Crisco (ou le beurre) au fond du moule puis de saupoudrer la farine dans le fond à l’aide d’une grosse cuillère, en tapotant le moule pour qu’elle recouvre la surface. Ma mère voulait être sûre que le gâteau n’adhérerait pas. Les siens collaient rarement. Les miens sortent rarement intacts.
L’utilisation d’un moule à kouglof fait courir le risque au pâtissier d’avoir le dessus doré comme si le gâteau était cuit, sans que le cœur soit assez cuit. Il faut parfois recouvrir le dessus d’une feuille d’aluminium puis faire le « test du cure-dent ». (Quand j’étais petite c’était le test de la paille de balais). Ça veut dire qu’il faut piquer à l’intérieur du gâteau puis retirer le cure-dent. S’il ressort recouvert de pâte, c’est que la cuisson n’est pas terminée. S’il ressort propre, le gâteau est cuit.
Quoiqu’il en soit, ne laissez JAMAIS refroidir le gâteau dans le moule. Une fois le gâteau cuit, il faut le sortir du four, le laisser reposer 5 min, puis passer un couteau fin entre le moule et le gâteau. Renverser sur un plat et recouvrir immédiatement. Servir le lendemain.
Sur la table de « Mamie Winchester », il y avait un pound cake tous les dimanches. Son préféré était le pound cake au caramel et aux pommes. Elle adorait également le pound cake à l’ananas.
Quel est votre pound cake préféré ?
Peu importe ce que nous ajoutions à la recette de base du pound cake, nous avions toujours le plaisir de le déguster avec ceux que nous aimions.
Renea winchester est l’auteure d’Outbound Train : Firefly Southern Fiction April 2020 ;
sorti en France en avril 2021 sous le titre De l’autre côté des rails.