A Bonus Recipe BookletInspired by the Women of Outbound Train
This summer, the publisher in France asked me to write a little recipe booklet of ten recipes which she would publish with the hopes of pairing with the French version of Outbound Train to increase sales.
I submitted twenty-two recipes which we hoped to release in October. But life got in the way of the release schedule. Isn’t that always the case? Fortunately, we pushed through and this week, Bryson City Recipes released in both Bordeaux, France and in the US. While Marie released her French version, I opted to self-publish the booklet exclusively on Amazon. I hope you will consider purchasing this little booklet if you haven’t already. There is still time to send a copy for those who love to read, and bake.
The recipe booklet features introductory essays from the Parker Women of Outbound Train. Here is a little tease. Barbara brought tears to my eyes when she whispered this little story in my ear.
I know in my heart I can’t stop time, but if I could, I would stop it on a Sunday morning. I would freeze the moment when I peer over the coffee cup at Carole Anne.At times, just looking at her steals my breath. She deserves more than I can offer.I hope her future is better than what I can provide inside the walls of this tin-can trailer.I hope when she gets out on her own, she finds love.Yes, love, and gravy-covered biscuits. Who could want anything more?
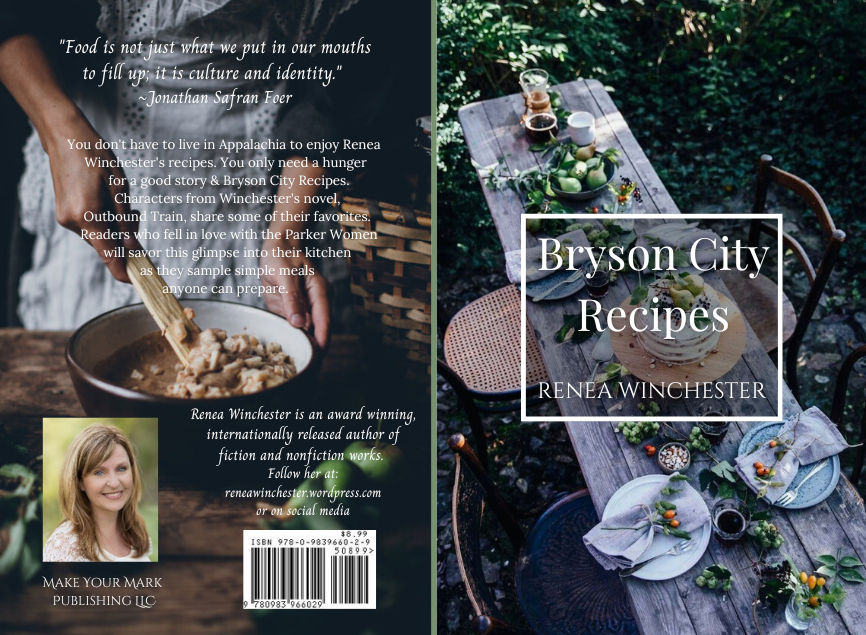
As with my other international release, Marie contracted with a local artist who painted the cover. With this booklet, she wanted the cover to feature some of the dishes. This meant me spending time in the kitchen and then setting a table outside to capture the photo you see below during the heat of August before two inches of rain descended in what we call a “frog strangler.” I would like to say the table survived, but alas, it did not. I do think Claire perfectly captured the image Marie hoped for. I partnered with an amazing designer who created something better than I could have imagined. What do you think?
My Concept Photograph Claire’s Creation
Here is the US Cover. I love the back cover almost as much as I adore the front !
Am I the only one who feels like 2022 fell through my fingertips like grains of sand? It was a gloriously busy year. One that saw my speaking calendar filled with events that allowed me to spend time with you, the reader. I was keynote speaker for three conferences, lead workshops at four different conferences, taught multiple herb classes, spoke to countless libraries, book clubs, and bookstores. We had a great time, didn’t we? If you’d like me to visit in 2023, please reach out.
Things were also busy on the land. Poppa and I invested a lot of sweat equity into our little farm. We are growers for Sow True Seed, a company specializing in offering non-GMO seeds to the public. I’m happy to report our crops passed the germination test, which means our harvest will be packaged and available for the public in 2023. Next year, Sow True Seed has asked us to grow the local favorite, Cataloochee Corn. This thrills me.
I am lucky to have this land and I have vowed to continue growing, seeds, herbs, and -Lord willing – offer the land for artists who need a quiet place to create. While others around me are selling farmland, I am doing everything within my power to keep mine! When you support me, you support the preservation of this land from development.
Also on the land, I am more than a year behind schedule due a non-conforming building that I just can’t get fixed and working a fulltime job. I pray this spring to have an “open house.” I covet your prayers.
If you’re struggling to find a last-minute gift for the holidays, Bryson City Recipesis available exclusively on Amazon in print and as an e book. Currently, Amazon has a two-day-turn around for print copies. So order today for your gift-giving. There is still time !
Heading into 2023, I am deeply grateful for my health and the health of those I love. It hasn’t been an easy year, but we press on. I pray for the farm, for our future, and for you. Yes, I pray for you. I hope I see you in person and if I don’t you can always find me on social media, or, on the land.
Here’s wishing you a safe and happy holiday season. With love, Renea
There’s a chapter in the novel, Outbound Train, where Granny Pearlene uses cakes as currency. I grew up with this type of bartering system which is why I incorporated it into my novel. The women in my family were known for their ability to cook bountiful meals which always included a made-from-scratch cake for dessert. It was common to find Appalachian women in the kitchen on Saturday night, making a pound cake, which typically included a pound of butter, flour, sugar, eggs.
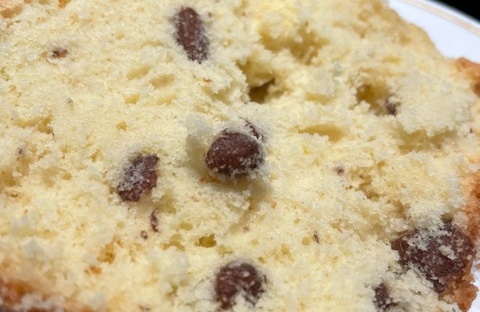
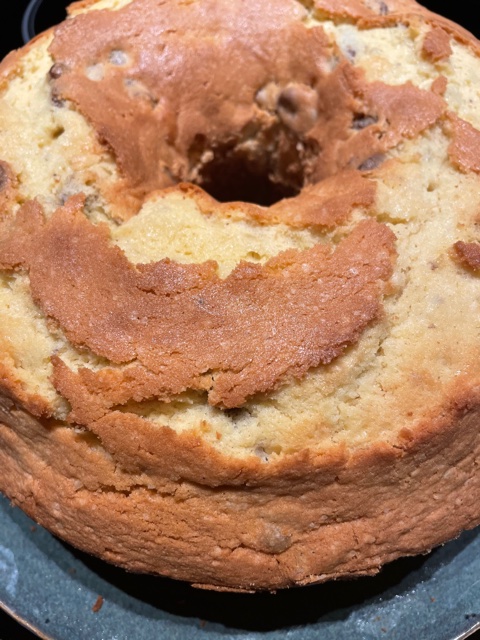
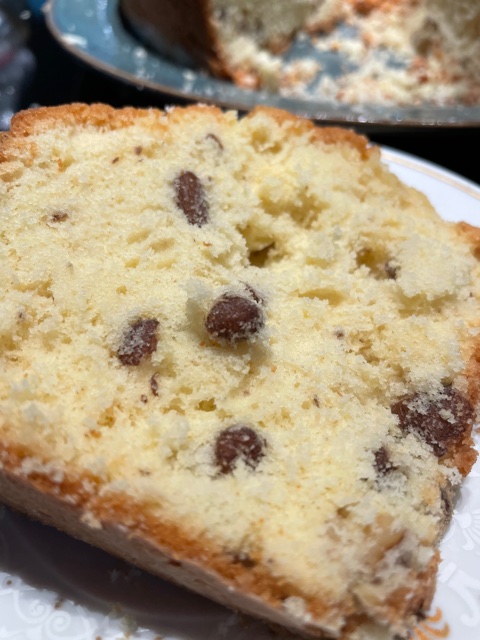
Black Walnut Pound cake: An Appalachian Tradition
Cakes were made on Saturday because the most delicious pound cake is one that sets overnight beneath glass cake pan. This allows the cake to re-absorb any moisture that would evaporate while the cake cools. I suppose women tired of plain pound cake, because in typical Appalachian fashion, the women in my family collected black walnuts (folk call it “wild-harvested” or “foraged”) and relished in adding them to cakes They also made a delicious black walnut ice cream, which we served on plain pound cakes, but I digress.
I grew up with two types of black walnut cakes: the “pound cake” variety, baked in a Bundt pan, and the “layered cake” with cream cheese frosting.
We used black walnuts because that is the only nut-tree common in our mountains. We couldn’t afford pecans, which grow abundantly in the Southern most part of the US. Black walnuts shouldn’t be confused with what we call “English walnuts.” Ours are tangy and strong due in part to an abundance of oil in the meat of the nut. While English walnuts can be used in this recipe, the strength of the black walnut can’t be duplicated.
As a child, my brother and I would wait at the bus stop beneath two gigantic black walnut trees at the edge of the road. We had a job while waiting, rolling the green-husked walnuts into the tire path with our feet so Poppa would drive over them each evening at precisely 4:40 pm when he returned from work. We knew better than to position the walnuts with our fingertips. Black walnut husks have been used for decades as ink and dye. No one has ever mastered the art of collecting black walnuts without wearing stained fingertips for weeks after.
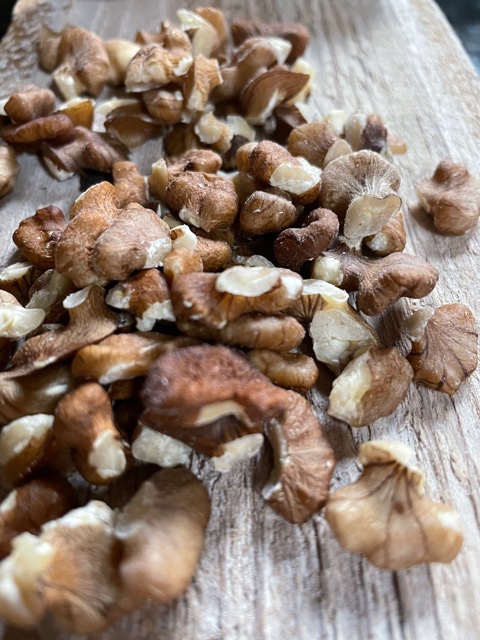
Freshly shelled #blackwalnuts from W. Cloer B.C. N.C.
After Poppa’s truck rattled across the walnuts, mother steered a wheelbarrow to the end of the driveway and donned bright pink Palmolive dishwashing gloves. She tossed the green husks aside and collected the nuts. That was phase one of the harvesting process. From there, she positioned the nuts on a piece of tin and let them dry in the sun. Once dry, a much longer phase two began: each night she and Poppa would sit in the floor; they each had a rock, or sometimes a brick, and a hammer. There’s a certain way one holds a walnut to crack it, and before you go buying a “nutcracker,” no human has ever created one tough enough to crack an Appalachian walnut. You need a hammer, a rock, patience, and perhaps a Magnavox television playing the nightly news with Walter Chronkite.
That’s how it was done when I was a kid. After doing the “hard part,” of cracking the exterior shell, my parents passed the broken nuts to me or my brother. We used a tiny hook to remove any pieces of the nut-meat that remained. We did this as a family and it was an honorable thing to do. As kids we didn’t complain when our parents asked us to do something; we had pride that they trusted we were capable.
Back to Saturday in the kitchen:
My mother didn’t exactly write out all her recipes so I was delighted to discover one in her recipe book. You see, the publisher in France wanted to know if the cakes in Outbound Train were real. If so, was I willing to share with her readers?
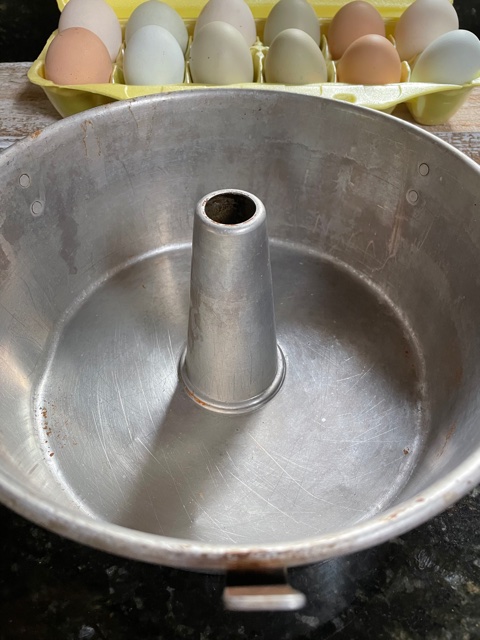
The perfect cake begins with Momma’s dented pan and fresh eggs
Y’all ! French chefs are considered the best in the world and she asked me to share our simple walnut cake used with nuts we pick up at the end of the road. Note: The FRENCH Translation of this blog post appears at the end of this post.
The recipe:
3 cups flour
2 cups sugar ( I use a mixture of white cane sugar, and light turbinado sugar). You can not use dark brown sugar in this recipe
1 cup butter, softened
2 teaspoons baking powder
1 cup black walnuts
3 eggs
1 cup milk: Mother would use whole milk. Not cream, and never 2%
Eggs were always kept at room temperature at my house. This is a tradition I continue, because I am fortunate enough to have a small flock of hens.
The process: Preheat oven to 325 degrees
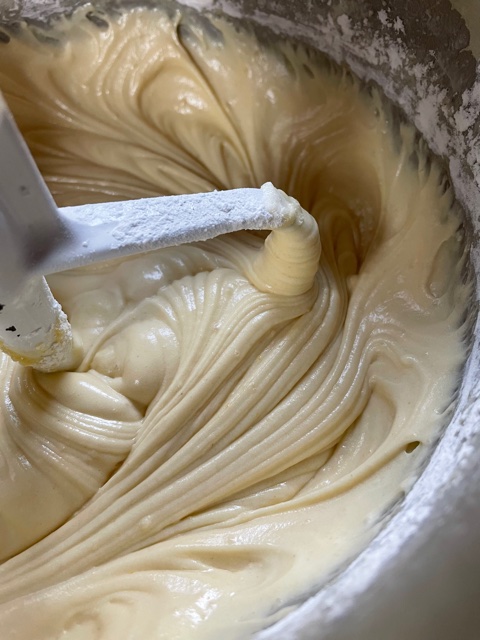
Batter is ready for the walnuts
Cream butter and sugar together
Add eggs and mix slowly
Add 1 cup flour and the baking powder
Mix
Add another cup of flour
And then the milk
Mix
Add the final cup of flour
And the vanilla
Add the walnuts
The pan: A Bundt pan is absolutely imperative in the success of this cake. I use my mother’s plain cake pan. She had “fancy” pans, with scalloped ridges, and designs. However, I grew up with simple cakes and I like to honor that memory. Granny Pearlene most certainly did not own a fancy pan.
My job as a child was to spread Crisco (or butter) on the bottom of the pan and then sprinkle a tablespoon of flour on the bottom, tapping the pan until flour covered the surface. Mother wanted to make sure the cake wouldn’t stick. Hers rarely did. Mine rarely come out intact.
Confession: I love the batter, almost as much as I love the cake.
Using a Bundt pan means bakers run the risk of having a lovely brown top and an unbaked center. Sometimes you may need to cover the top of the cake with aluminum foil and then use the “toothpick test.” (It used to be a broom straw test when I was growing up. We didn’t have toothpicks). What this means is you stick a toothpick into the center of the cake and remove it. If the toothpick has batter on it, then it isn’t finished. If it comes out clean, the cake is done.
My “Granny Winchester’s” Sunday table featured a pound cake every single Sunday until she stopped baking. Her favorite was a caramel apple cake. She also adored a pineapple pound cake. Just typing this makes me want to bake a caramel apple.
Don’t you miss the days of Sunday pound cakes. Tell me, what was your favorite?
Regardless of what Appalachian women added to the simple pound cake, we always had the pleasure of enjoying it with those we love.
Renea Winchester is the of Outbound Train, which released in April 2021 in France titled On the Other Side of the Tracks.
All photos Copyright, Renea Winchester
La pâtisserie comme monnaie d’échange : le gâteau aux noix de Mamie Pearlene
Dans le roman De l’autre côté des rails, Mamie Pearlene utilise ses gâteaux comme monnaie d’échange.
Petite, j’ai connu ce système de troc, et je l’ai incorporé à mon roman. Les femmes de ma famille étaient connues pour leurs merveilleux repas. Ils comprenaient toujours un gâteau fait-maison pour le dessert. Les femmes des Appalaches passaient souvent leur samedi soir en cuisine pour préparer le pound cake, préparé avec une livre (pound) de beurre, 1 livre de farine, une livre de sucre, des œufs. Les gâteaux étaient préparés le samedi car les meilleurs pound cakes sont ceux qui ont reposé toute la nuit sous une cloche en verre. Cela permet au gâteau de réabsorber l’humidité qui se serait sinon évaporée pendant la phase de refroidissement.
Je suppose que les femmes se sont lassées de la recette de base du pound cake. Comme cela se pratiquait couramment dans les Appalaches, les femmes de ma famille ramassaient les noix noires (les gens d’ici parlent de « récoltes sauvages » ou bien de « cueillettes ») et elles les ont délicieusement ajouté à leurs gâteaux. Elles préparaient également une succulente crème glacée aux noix noires, que l’on servait avec les pound cakes, mais je m’éloigne du sujet. Quand j’étais petite, il y avait deux sortes de gâteaux aux noix : le « pound cake » aux noix, cuit dans un moule à kouglof, et le « gâteau multicouche » et son glaçage au cream cheesse.
Miam.
Les femmes des Appalaches utilisaient des noix noires car c’est le seul arbre à noix qui soit courant dans nos montagnes. Nous ne pouvions pas nous permettre d’acheter des noix de pécan, qui poussent en abondance dans la plupart des États du sud. Les noix noires ne doivent pas être confondues avec ce que nous appelons les noix anglaises. Les nôtres ont un goût acidulé et prononcé, en partie dû à la forte concentration en huile au cœur de la noix.
Quand nous étions enfants, mon frère et moi attendions le bus sous deux énormes noyers qui poussaient au bord de la route. Tout en attendant le bus, nous avions pour mission de faire rouler l’enveloppe verte des noix sur les traces de roues pour que Papa roule dessus à 4h40 précises, tous les soirs, en revenant du travail. On savait bien qu’il ne fallait pas le faire avec les doigts. L’écorce de noix noire est utilisée depuis des décennies pour faire de l’encre et de la teinture. Personne n’a jamais réussi à ramasser ces noix sans garder les doigts tâchés pendant des semaines.
Une fois que la camionnette de Papa était passée sur les noix, ma mère poussait sa brouette jusqu’au bout de l’allée puis enfilait ses gants de vaisselle Palmolive rose. Elle jetait les enveloppes vertes sur le côté et ramassait les noix. C’était la phase une de la récolte. Elle plaçait ensuite les noix sur une plaque métallique et les laissait sécher au soleil. Après le séchage démarrait la phase deux, beaucoup plus longue : tous les soirs, Maman et Papa s’asseyaient par terre. Ils prenaient un caillou, parfois une brique, ainsi qu’un marteau.
Avant d’envisager l’achat d’un “casse-noix”, il faut savoir qu’il y a une façon de tenir la noix pour la casser. Ne perdez pas votre temps à chercher un outil du commerce pour vous faciliter la tâche. Aucun humain n’en a créé un qui soit assez solide pour casser une noix des Appalaches. Il vous faut un marteau, un gros caillou, de la patience, et peut-être une télévision Magnavox et les nouvelles du soirs par Walter Cronkite.
C’est comme ça qu’on faisait quand j’étais petite. Nous cassions les noix en regardant la télévision. Après avoir fait « le plus difficile », craquer la coquille, mes parents nous donnaient les noix, à moi et à mon frère. Nous utilisions un crochet minuscule pour retirer les derniers petits morceaux de cerneaux. Nous faisions cela en famille et c’était une chose honorable. Enfants, nous ne nous plaignions pas quand nos parents nous demandaient de faire quelque chose ; nous étions fiers d’être dignes de leur confiance.
Mais retournons maintenant dans la cuisine, les samedis soirs :
Ma mère n’écrivait pas vraiment toutes ses recettes et j’ai été ravie d’en découvrir une dans son carnet de recettes. L’éditrice française voulait savoir si les gâteaux du roman existaient. Et si j’étais d’accord pour les partager avec les lecteurs.
Les chefs français sont considérés comme les meilleurs du monde et elle m’a demandé de partager notre petit gâteau, confectionné avec les noix que nous ramassions au bout de la route.
Voici la recette :
3 mesures de farine
2 mesures de sucre (j’utilise un mélange de sucre de canne blanc et de sucre turbiné). On peut aussi utiliser du sucre brun
1 mesure de beurre ramolli
2 cuillérées à café de levure
1 mesure de noix
3 œufs
1 mesure de lait : ma mère utilisait du lait entier. Pas de crème et jamais de lait écrémé.
1 cuillérée à café de vanille liquide
Notes :
Les oeufs étaient toujours conservés à température ambiante. C’est une tradition que je perpétue, car j’ai la chance d’avoir quelques poules. Et nous avons plutôt la main lourde sur la vanille.
Marche à suivre :
Préchauffer le four à 180°C
Mélanger le beurre et le sucre
Ajouter les œufs et mélanger doucement
Ajouter une mesure de farine et la levure
Mélanger
Ajouter une autre mesure de farine puis le lait
Mélanger
Ajouter la dernière mesure de farine
La vanille
Les noix
Verser dans le moule et cuire à 180 °C pendant 45 min à 1h. Jusqu’à ce que le cure-dent ressorte propre.
Le moule :
il est impératif de disposer d’un moule à kouglof pour réussir ce gâteau. J’ai utilisé le moule à pound cake tout simple de ma mère. Elle possédait aussi des moules «fantaisie », ornés et festonnés. Mais j’ai toujours connu des gâteaux simples et je voulais faire honneur à ce souvenir.
Enfant, ma tâche était d’étaler la margarine Crisco (ou le beurre) au fond du moule puis de saupoudrer la farine dans le fond à l’aide d’une grosse cuillère, en tapotant le moule pour qu’elle recouvre la surface. Ma mère voulait être sûre que le gâteau n’adhérerait pas. Les siens collaient rarement. Les miens sortent rarement intacts.
L’utilisation d’un moule à kouglof fait courir le risque au pâtissier d’avoir le dessus doré comme si le gâteau était cuit, sans que le cœur soit assez cuit. Il faut parfois recouvrir le dessus d’une feuille d’aluminium puis faire le « test du cure-dent ». (Quand j’étais petite c’était le test de la paille de balais). Ça veut dire qu’il faut piquer à l’intérieur du gâteau puis retirer le cure-dent. S’il ressort recouvert de pâte, c’est que la cuisson n’est pas terminée. S’il ressort propre, le gâteau est cuit.
Quoiqu’il en soit, ne laissez JAMAIS refroidir le gâteau dans le moule. Une fois le gâteau cuit, il faut le sortir du four, le laisser reposer 5 min, puis passer un couteau fin entre le moule et le gâteau. Renverser sur un plat et recouvrir immédiatement. Servir le lendemain.
Sur la table de « Mamie Winchester », il y avait un pound cake tous les dimanches. Son préféré était le pound cake au caramel et aux pommes. Elle adorait également le pound cake à l’ananas.
Quel est votre pound cake préféré ?
Peu importe ce que nous ajoutions à la recette de base du pound cake, nous avions toujours le plaisir de le déguster avec ceux que nous aimions.
Renea winchester est l’auteure d’Outbound Train : Firefly Southern Fiction April 2020 ;
sorti en France en avril 2021 sous le titre De l’autre côté des rails.
Don’t ya hate those recipe-sharing blogs that make you scroll through dozens of pictures when all you want are the ingredients? Today I share a recipe for Pizza which I bake in a cast iron skillet. Photos at the end of the post.
Ingredients:
1-3/4 to 2-1/4 cups all-purpose bread flour
1 envelope Fleischmann’s® Yeast
1/2 teaspoons sugar
3/4 teaspoon salt
2/3 cup very warm water (120° to 130°F)
3 tablespoons Olive Oil
2 teaspoons crushed rosemary
½ teaspoon onion powder
½ teaspoon garlic powder
Yield: (2) 10-inch pan pizzas
Combine 1 cup flour, undissolved yeast, sugar, herbs, and salt in a large bowl. (Sugar is required to “feed” the yeast. If you’d like, replace sugar with ½ teaspoon of honey). Add warm water and oil; mix until well blended, about 1 minute. I use the dough hook while mixing. Gradually add enough remaining flour to make a soft dough. Finished dough will be slightly sticky.
Form in a ball and let dough rest.
While dough is resting, heat oven to 400 degrees and place cast-iron skillet in oven. Preheating the skillet works to quickly form a crust once the dough is ready. Chop veggies and other toppings for pizza.
Cut dough in half. Sprinkle dough with flour to prevent sticking. Using a roller, press the dough flat and place in skillet (careful not to burn yourself on the hot skillet). Press dough and prick dough with a fork. Drizzle with olive oil (which promotes browning). Return the dough to the skillet and bake for 2-3 minutes. Baking the dough for a few minutes prevents it from being soggy.
Remove dough from oven. Increase the temperature to 450 degrees. Add the toppings. Bake for ten minutes or until cheese has melted and bubbly.
This dough can be made ahead and stored in a plastic bag in a container overnight. To do so, drizzle a bit of olive oil in the bag, add the dough ball and wrap a rubber band around the dough to prevent it from rising inside the bag. Refrigerate and use the next day.
Important News Herbs: I add crushed rosemary, onion, and garlic powder to the dough because they provide a healthy balance to the pizza. Most of us know the medicinal value of garlic and onions, but do you know that rosemary helps improve memory, is a liver detox, and increases gallbladder function? I highly recommend adding rosemary to your pizza dough.
Dough resting. Cut in half, roll, and bake in skillet
Add toppings after baking crust for a few minutes and increasing temperature to 450 degrees
Enjoy!
Renea Winchester is the author of Farming, Friends, and Fried Bologna Sandwiches. Firefly Southern Fiction will release her debut novel, Outbound Train, in 2020.
Note: This is NOT a Gluten Free recipe, but the amount of gluten is dramatically decreased and still produces a delicious crust. Recipe Makes Two Flatbread Crusts
Ingredients:
(1) cup Gluten Free Flour (I only use King Arthur)
(1 ½) cup Bread Flour (that has gluten)
(1) Egg
(1) package of yeast
(1 1/4) cup hot water 120 degrees
(1) teaspoon garlic salt
(1) teaspoon rosemary (or, 1 teaspoon Italian Seasoning)
(2) Olive Oil, plus an extra tablespoon added to edges of dough before baking
(1) small bunch of fresh basil
(4) small tomatoes sliced
(1) green pepper, sliced
(1) small onion sliced
Pepperoni
Your choice of Cheese
The Process: Note: Use Dough Hook When Mixing
Pour gluten free flour into bowl, add bread flower, and yeast. Turn mixer on and mix to incorporate dry yeast into flour. Slowly add egg, oil, and water. Add garlic salt and dried rosemary. If dough is too sticky add more flour one tablespoon at a time until dough forms a ball.
Remove hook from mixer and set dough aside to rise until double in size. Approximately 45 minutes.
While dough is rising: Slice vegetables. When using fresh vegetables remember to place them on a kitchen towel after slicing. This removes excess moisture and will prevent a soggy flatbread.I always precook the onions a bit in the microwave which removes the moisture, but they still need towel-time to remove excess moisture.
Shaping the Crust:
First, preheat the oven to 400.
Punch down the dough and cut it into two sections. Refrigerate one section and shape the other into the desired shape for your pan. I used a rectangle cookie sheet.
Press tomato slices into the dough. One might think this makes the flatbread sticky, but it doesn’t. Snip fresh basil with scissors, then add onions, green peppers, peperoni and any other topping you desire.
Brush olive oil around crust edges. If you want an extra brown crust, melt 1 tablespoon of butter and add a pinch of garlic salt, then brush around edges.
Bake 10-20 minutes depending on oven performance and the consistency of crust you desire.
A word about Basil: Because basil tends to darken when cooked. Placing it close to the dough may prevent discoloration, or, you can wait until the flatbread has cooked and garnish with basil (and extra cheese).
Renea is an award-winning author, blogger, and Georgia Writers Group Board Member . She has belonged to a phenomenal critique group forover a decade and both of her books, Farming, Friends & Fried Bologna Sandwichesand In the Garden with Billy received SIBA nominations. She is a passionate friend of SIBA and local independent booksellers throughout the South. Renea is vested in the writing community of North Carolina and Georgia and has judged multiple writing competitions. She lives on a farm with two goats names Frosty and Oreo. Contact her here.
the recipe for Italian Gravy (what we call Spaghetti Sauce with meat) can be found here.
Back to the garden, it’s pickin’ time.
Y’all try these recipes and let me know what you think.
Renea Winchester is the award-winning author of several e-book collections and three traditionally-published non-fiction books including her latest:Farming, Friends and Fried Bologna Sandwiches from Mercer University Press. Find more recipes such as this one in her book. She is passionate about heritage seeds and saving daffodils. When she isn’t digging in the dirt she is hoarding canning jars and reading good books. She also posts on her blog, Bloggin’ Billy’s. Find her also at Renea Winchester.
Perhaps my favorite chapter in Farming, Friends, and Fried Bologna Sandwichesis Chapter Four where I share the recipe for collards and explain why we Southerners eat what we do on the first day of the year. There is a reason we eat collards, and for some this delicacy has more to do with remembering how the South scratched and clawed her way back from destruction. Ponder for a moment, the lowly cow pea (black-eyed-peas) being left for Southerners to eat. The Yanks thought we had been defeated, but today, it is the Yanks who have moved to the South in droves, hungry for our lifestyle. I for one propose that if you are going to live “down South” you must partake of our heritage food.
Many reader might recall smelling a pot of collards simmering on the stove. That is not how I cook my collards, nor do I sprinkle them with vinegar. If you have tried boiled collards with vinegar and cringed at the taste, please give this little recipe a try. These are prepared using a cast-iron skillet.
Ingredients
One bunch of collards
1 package of hog-jowl with thick outside layer removed; or 1/2 pound of thick-cut bacon (extra crispy)
2 cans of chicken broth
Salt and Pepper to taste
2 Tablespoons Olive Oil
The Process
Preheat oven to 350 degrees.
Bake hog-jowl (or bacon) in the oven. I prefer to bake bacon and collards in the oven because this limits smoke and prevents grease from popping on your skin, and on the kitchen counter. While meat bakes prepare greens. Turn meat once to insure extra-crispiness. Drain on paper towel. Once cool,crumble.
Crumble when cool. Add to greens last to ensure crunchy texture.
Preparing the Greens:
Rinse collards to remove any dirt, drain on towels.
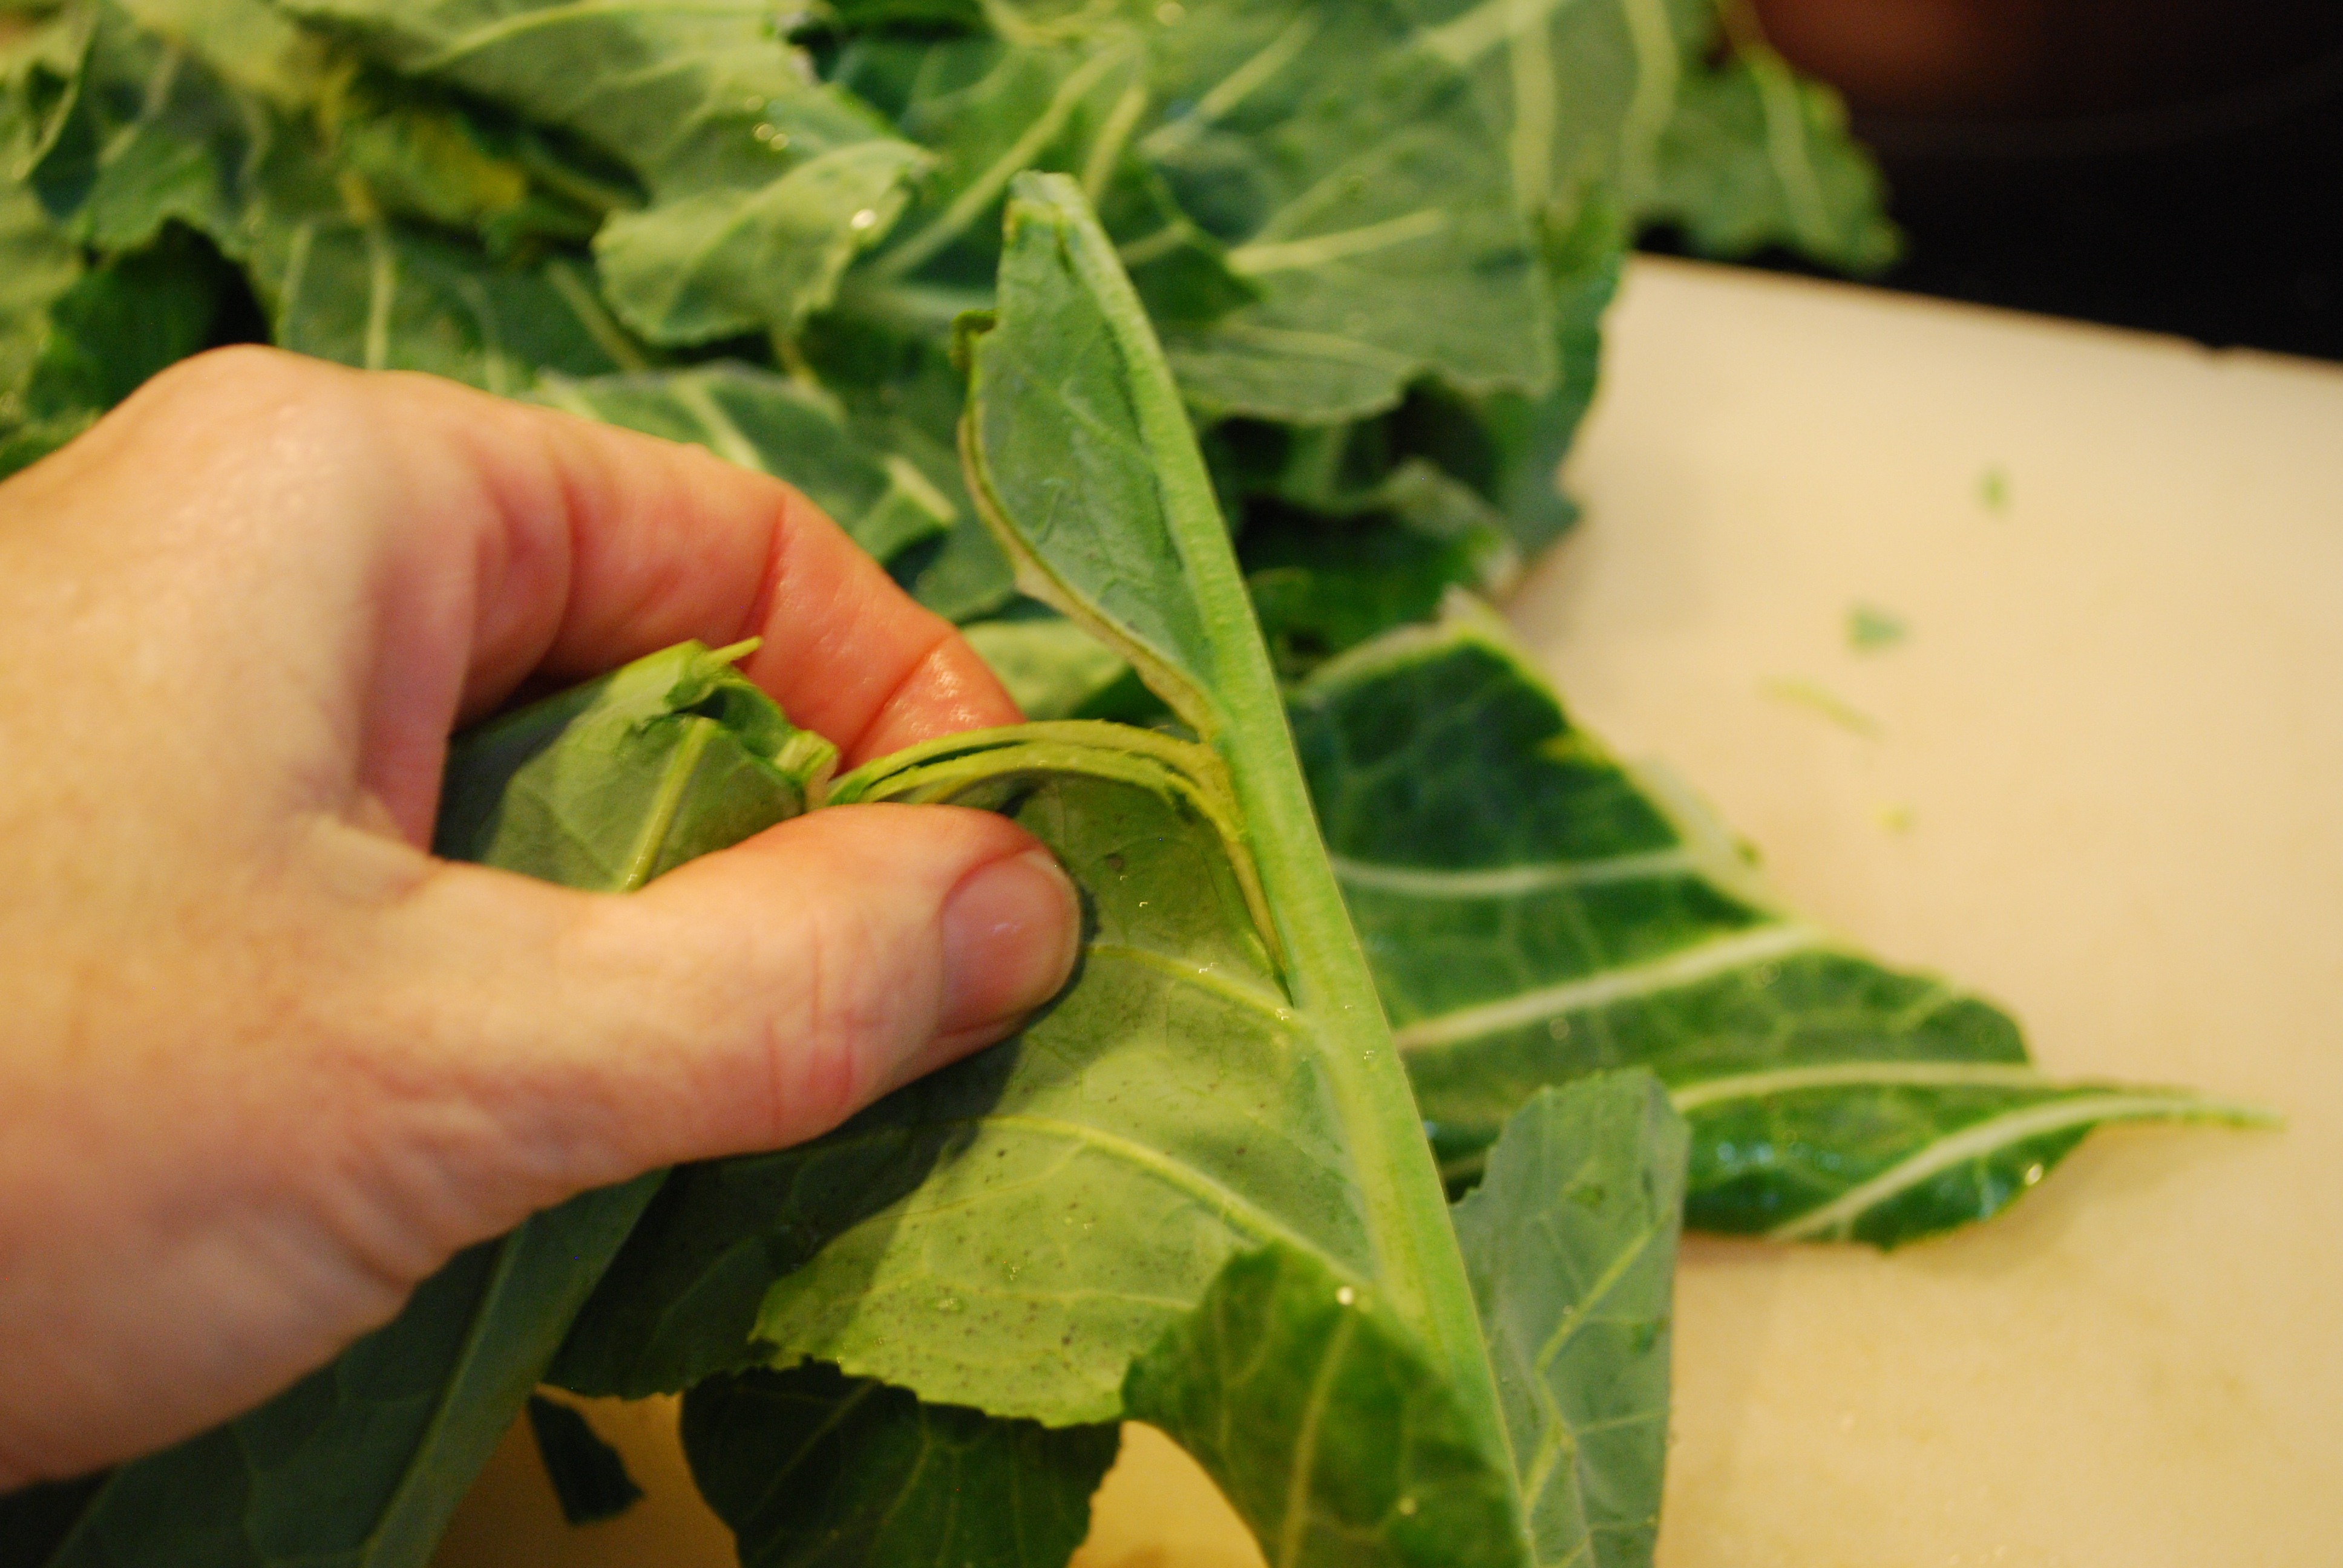
Strip the leaves.
Remove ribs of the collards and chop into bite-sized pieces.
Pour Olive Oil in bottom of cast iron skillet and turn eye on medium-high.
When oil is hot add one piece of greens. If it starts to sizzle, pan is ready.
Add as much greens as possible, turn skillet to medium. Cover skillet.
Once greens wilt, add remaining collards.
Add one can of chicken broth. If you want a large amount of pot likker (see image below), add two cans.
Keep a lid on greens for three minutes.
Remove lid and stir.
Cook the greens until they are the consistency you desire. I do not cook mine “to death,” because I do like a good bit of pot likker with my greens.
Add hog jowl just before serving. I add the meat last because I want to retain a bit of crunch with my greens. You can add it during the cooking process if you would like.
Serve with cornbread.
Goodbye 2014 Happy New Year friends. Best to you in 2015
Many years ago, (meaning back before internet) someone in my family brought a gathering of sugary goodies to our Christmas Eve dinner. The tray contained an assortment of divinity, chocolate peanut-butter balls -which go by the name of truffles these days. The tray also featured tiny cubes of chocolate cherry fudge.
Folk don’t make fudge like we used to. I don’t know why . . . we just don’t.
I am uncertain why the memory of this confection came to me last week, but the urge to find a recipe and recreate this candy became my obsession. I searched, googled, and fell back on the good-old-reliable archaic method of recipe mining, a cookbook!
See how creamy and dreamy? Trust me my friends, you must try this recipe. Do NOT use dried fruit. Dried fruit = dry fudge.
Now there is a reason No Fail Fudge recipes exist, because if you don’t get fudge just right the mixture becomes a gooey mess which must be eaten with a spoon (not that there is anything wrong with that); or, it sets up like cement (definitely something wrong). No fail fudge usually contains marsh-mellow fluff, which is one of the reasons fudge doesn’t taste as delicious as we remember. The recipe I am sharing today doesn’t contain fluff; instead it uses the secret ingredient your grandmother kept stocked as a staple: evaporated milk.
Yesterday my friend Helen and I began a new tradition, we set about making all sorts of yummy cookies and confections to give away. When I expressed my worry about the fudge Helen, whom I have renamed the Cookie Queen, said in her Queenly voice, “there’ll be no failure today.”
She was correct.
With that let me share the steps to what is the easiest, most delicious fudge you will ever make. I’m serious, bring this to family events and you might be crowned the Candy Queen.
Chocolate Cherry Fudge
Ingredients:
1/3 cup finely chopped maraschino cherries (well drained. Note: keep them on a paper towel and -gently- squeeze out extra juice)
1 stick of butter
3 and 2/3 cups of powdered sugar
½ Cup Cocoa
½ cup chopped pecans or walnuts
¼ cup EVAPORATED milk (purchase the tiny can unless you are making a bunch of fudge). Not Sweetened Condensed
1 teaspoon vanilla
Maraschino Cherry halves (well drained, for topping)
Before we begin:
I like to measure out all ingredients: It takes about 2 minutes to pre-measure ingredients and set them up ready for use.
Do not double this recipe. The total prep and baking time is about 15 to 20 minutes, which includes chopping and draining the cherries. Something bad happens when one tries to double a fudge recipe. Please don’t do it.
The Process:
Lightly butter a glass 8 x 8 pan and set aside.
In a metal pot melt butter on medium-high heat. Once butter has melted add powdered sugar and cocoa. Place whisk in the middle and stir creating a “bowl.” Powdered sugar will be on the side of your pan, but that is fine, create a hole and pour in the milk. (see image).
Stir until powdered sugar lumps are gone and mixture is thick and creamy. (three minutes to five minutes at the most)
It’s ok to take a taste at this stage. I won’t tell.
Add vanilla.
Add nuts and stir well.
Remove from heat and fold in cherries.
Carefully fold nuts and cherries into fudge. The moisture from the cherries will keep this candy from being cement-hard.
Transfer mixture to glass pan.
Image of fudge that is ready for cherries as garnish.
Top with cherries if you desire and place fudge in refrigerator to cool for approximately 30-45 minutes. Slice after fudge cools
Scrape any remaining fudge from pan and eat. (you know you will so I might as well include that as part of the recipe).
Take away comments:
The best part about this fudge is that it is moist. Using maraschino cherries prevents the fudge from drying out. We have all seen fudge that hardens to the consistency of cement. This will not happen with this candy. It is moist and oh-so-delicious.
Do give it a try and let me know how it works for you. Please consider buying my book for more delicious recipes.
Friends, if you want to give a gift that is wonderfully delicious and easy to make, then I have a recipe for you. Holiday Jalapeno Relish uses the excess Botanical Interest jalapeno peppers that are still going strong in Southern gardens (at least they are in mine because I covered them when frost threatened). Add sugar, vinegar and a couple other ingredients and ta-da, you’re done.
Ingredients:
1 pound of jalapeno peppers (washed)
1 medium onion
4 medium carrots sliced thin
1 large bell pepper (green)
3.5 cups of sugar
2 cups apple cider vinegar
1 Tablespoon mustard seed
1 Tablespoon dill seeds
Jelly Jars
Large pot for hot water bath (processing jars)
Instructions:
Step one: wear gloves. Gloves are essential.
Before you begin slicing make certain the peppers are clean. I rinse mine thoroughly and soak for a couple of minutes.
Slice carrots, onions and bell pepper and set aside.
Slice jalapeno peppers and carefully remove seeds by using a spoon to scrape away membrane and seeds (this is what makes the relish hot). If you like spicy relish keep some (not all) of the seeds, but discard the membrane as it will make the relish bitter.
In a saucepan add 3.5 cups of sugar, 2 cups of apple cider vinegar, 1 Tablespoon of yellow mustard seeds and 1 Tablespoon dill seeds. Stir until sugar dissolves. Add all vegetables and cook for 15 minutes.
Spoon mixture into jelly jars and press down to add as much relish as possible in the jar. If desired spoon extra liquid into jars. There should be about a cup of liquid left over that will either need to be discarded, or, boil a half dozen eggs, shell the eggs, and pour the brine over top. Instant spicy pickled eggs. (which I also give as Christmas gifts).
Wipe the glass rim of the jars to make sure they are clean. Add lid and ring. Tighten and add unsealed jars to large pot. Add enough WARM water to cover the top of the jars with 2 inches of water. Bring the water to a boil and boil the jars for ten minutes.
Remove from heat.
Refrigerate any jars that do not seal and serve immediately.
Slice onions, bell pepper, carrots and set aside while you chop jalapeno peppers
Remove the membrane and seeds. Membrane makes the relish bitter. Seeds will make the relish spicy.
This is an image of the jalapeno peppers with seeds remove. Next step, slicing peppers.
Vinegar solution: ready for vegetables. Isn’t it lovely?
Vegetables in brine. Waiting to boil
Peppers will cook down rapidly.
Looks delicious, doesn’t it ?
Holiday Jalapeno Relish. The perfect gift for someone who matters to you. Visit Angierapids.com to learn about the quilt runner in the background.
Every now and then I come across a book that was written to help others. Food Camp: Kitchen Survival Skills by Michael Nolan, is one of those books. Now I know what you’re thinking, why in the world would I suggest a cookbook?
Well my friends, because the book is worthy of being read.Let’s begin at the beginning, quoting Nolan:
“To those who lived for years on microwave meals and fast food because they didn’t think they had what it takes to get in the kitchen and do it themselves. You deserve to eat better, and now you will.”
Food Camp includes what other cookbooks leave out: the appliances, pots, pans and gadgets one needs. Then the author sprinkles in little pieces of his soul. Some people are intimidated with the thought of cooking. Fear not, Michael Nolan is here to help.
The idea for Food Camp came when Nolan realized the number of people who never learned to cook. He goes on to list simple meals that are easy to prepare, but most importantly, good for you.
Food Camp includes photos and is written with a voice that makes you turn around to see if Nolan is in the kitchen with you. Truly, reading this book made me feel like the author was standing in my kitchen. I almost wanted to say, “Keep an eye on the cookies while I tidy up.”
Food Camp includes professional-quality photographic images and the recipes offer new twists on our favorites, like Chocolate Chip cookies. It’s common knowledge in my house that I mastered the triple C years ago. Veteran cooks wonder, what anyone could possibly do to improve something that’s been around for years. Trust me, there’s a secret. Nolan’s recipe for triple C’s contains a secret ingredient, but you won’t find me spilling the beans. You must buy the book.
And perhaps my favorite part is that Nolan suggests that readers actually eat cookie dough. Finally, someone who isn’t afraid of raw cookie dough. (for those still afraid you could store it in the freezer).
My take on Food Camp: You can have your dough, and cookies too.
Food Camp is filled with hearty recipes for each meal, even quick and nutritious recipes for those who say, “I don’t have time for breakfast.”
Friends, make time to check out this book. You won’t be sorry.
On January 28, 2014, thousands of Atlanta commuters became stranded on the interstate in two inches of snow and ice. Many mocked, pointed fingers, shifted blame and acted entirely unsouthern as the rest of the world watched (and giggled) while city-slickers struggled to get home. Saturday Night Live even featured Atlanta in a skit. It is a must-watch. Click the link here. The skit is funny because the first vehicle in the ditch near my house was a white “Esca-lada.”
The forecast for Wednesday isn’t pretty. Forecasters are predicting a “catastrophic event.” I learned today the term means that the National Weather Service expects ice so thick that emergency crews can not rescue you, should you loose your mind and hit the highways tomorrow. Hundreds of National Guardsmen are on standby, ready to take those with medical needs to the hospital.
Atlanta residents are being told to “hunker down” as this ice storm has decided to test our resilience and storm preparation once again. Governor Nathan Deal has spoken, as has Mayor Kasim Reed. The messages is clear, “by midnight on Tuesday, be in a location and plan on staying at that location for two days.” Citizens are being warned to gather provisions, firewood, water, batteries and food. This time, with the world watching, residents are paying attention. It’s our time to show people that Atlanta folk aren’t a bunch of city-sissies.
We do however want winter to end. A few hours ago #endwinternow was trending on Twitter.
Even the School Administrators have taken notice, cancelling classes (although it should be mentioned that students will have to make up these classes. Atlanta does not have snow days built into the schedule). Companies have sent their employees home, encouraging them to work from home if possible.
So instead of being snowed out of our homes, this time we are snowed in. And when snowed in there is really only one thing we can do . . .
Eat.
Under the advisement of elected officials, we visited the grocery store and piled buggies high with important provisions: milk, bread, bananas, and BACON! We waited in line patiently for gas, bought cat litter (even though we don’t have a feline in our home). We filled the bathtub with water, piled firewood at the door, and made a mad dash to the bookstore because Governor Deal told everyone, “this ice storm is a perfect chance to read a good book.”
You’ve gotta appreciate a Governor who uses an ice storm to promote reading.
The people of Atlanta are hunkered.
My Western North Carolina people are hunkering experts. I grew up with a pantry full of tomatoes, green beans and corn all ready should an emergency arise. In less than twenty minutes the women in my family could whip up a pot of vegetable soup big enough to feed a crew of linemen tasked with restoring power.
We did that many times, fed the power company men. We prayed for them too. We still do today.
Yesterday, neither the Gov’nah, nor the Mayor needed to tell me to get ready. While my husband said, “What’s the big deal? It’s going to be above freezing on Thursday,” I stacked wood, unloaded groceries, and placed water bottles in the freezer. At my house everything is ready.
I am sufficiently hunkered.
So today, while some residents made that last mad dash to the grocery store to purchase hot dog buns (because bread was gone two days ago), this little mountain girl put on a pot of beans.
Pintos.
Soup beans.
October beans.
Slice onions, sprinkle with Tabasco and pop in the microwave for two minutes
Whatever you call them, they taste the same . . . delicious.
This bowl made even more delicious with a layer of spicy onion and a wedge of cornbread.
So tell me dear ones, what are you cooking up fpr this winter storm?
If you’re snowed in like the rest of us, I would be honored if you’d download a copy of my work. Visit the links below